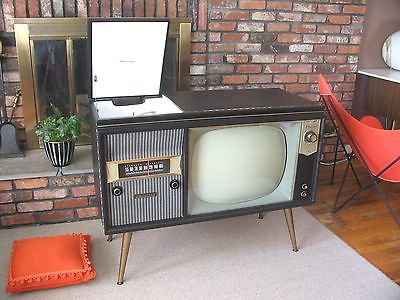
Collecting and restoring vintage television sets can be a really fun hobby. Like the old Victrola record player, antique TV sets are pieces of beauty. They were made to inspire and be the centerpiece of every living room. Before jumping into repairing and restoring your first vintage set, though, I would recommend reading up on a few of the basics.
Before going any further, I would really recommend that you know something about electronics. Understanding what capacitors, resistors, and transistors are is a must. Knowing how to solder is also a must. If it’s been a while since you’ve last done any soldering, I would recommend looking up some YouTube videos and brush up on the basics.
Also, know that a restoring a vintage television is a lot like restoring an old car. There are probably many parts that you can buy in a store online. The basic parts are pretty easy to come by. The rarer parts will be a lot more difficult. The ray tubes can almost always be model specific. Beyond the picture tube, though, some older models of TVs used vacuum tubes and other vintage electronics. These are hard to track down.
Don’t be afraid to be creative and look, though. You might very well be able to find a replacement part in another model television, an old radio, or even a guitar amplifier. Tracking down old components can be half of the fun.
It is good to understand that vintage television sets are old, clunky analog electronics. That’s a blessing and a curse. The parts are much larger and easier to work with. The PCB boards tend to have fatter circuit tracks and solder joints. That makes them much easier to replace parts and get tools into those tiny crevices.
Unlike digital electronics of today, though, analog electronics can be a little more complicated to diagnose. Digital electronics are nice because either a circuit is on or it is off, it works or it doesn’t Analog electronics can be within a threshold of working or not working. Voltages and variances can vary greatly. In fact, many circuits actually depend on that variance to work properly, like tuning a VHF frequency or receiving a signal from a VCR. Tracking down television-specific specifications may be rather tricky nowadays. Thankfully, there are plenty of places online to look where enthusiasts gather that would be more than willing to help.
One final word about these old, analog parts. They store electricity. Unplug any television set and let it set for a minimum of 24 hours before working on it. I would even suggest letting it sit as long as one full week unless you know how to properly and safely discharge electronics. Be very careful. Old televisions can hold and discharge enough amperage to kill a person if they aren’t handled properly.
With that said, I feel it is important to mention that this is not a be all, end all guide to restoring vintage television sets. Most likely, you will look to other forums and ask people for help. Remember to be polite, ask your questions specifically, provide as much context as possible, and list the information you have about your television set. This advice seems obvious, but it is seldom followed. If you leave this little guide with nothing else, let it be this advice.
Okay, so I’ve spent the last few paragraphs on precautions That all needed to be said, but now what? Let’s start with the tools you’ll need:
First and foremost, you will need a multimeter. Get a good one too, one that can read down to the 1/100th of a volt. That can be very important. A Multimeter that reads resistance, amperage, and DC and AC will be needed to. You’ll also need a few different size Philips screwdrivers, flathead drivers, a soldering pencil, soldering wick, solder, rubbing alcohol, dust free clothes, and some kind of tray to separate parts. A magnifying glass and a few alligator clips are really helpful too. Oh, don’t forget the needle nose pliers. A good computer repair kit will contain all of the tools needed minus a multimeter.
Let’s start with the simple stuff first. Vintage TVs actually had knobs that could adjust the horizontal and vertical picture as well as the sharpness and tone. These all work differently than modern day flat screen TVs. If the TV powers on but the picture looks off or distorted, check the television settings first. The TV may not turn on and display a legible picture without some adjustment first.
Another issue might be weird colors on the side of the TV. Remember, vintage TVs are all analog electronics. Magnets and magnetic charges can affect the picture on the TV. This can be easy to forget since magnetic fields don’t affect modern electronics in the same way. Chances are, a surround sound speaker, or subwoofer, might be too close to the TV. Make sure there are no magnetic fields within a few feet of the TV.
More commonly, though, older TVs don’t turn on, or the picture on the TV can’t be fixed by adjusting settings. If this is the case, it might be time to crack open the TV.
First, check the fuses. Older electronics had lots of fuses to protect the electronics in case of power spikes. Fuses are a cheap and easy fix.
If all the fuses look good, check for corroded and dirty contacts. Remember, these TV sets can be thirty years old or older. They’ve been exposed to air and moisture for a long time. If a contact looks dirty, try and clean it.
Next, look for any components that look obviously destroyed. Look for resistors that might be burnt or any electronic components that might be bulged or damaged. This includes the switches on the front of the TV that actually control power and tuning.
Pay attention to capacitors too. Capacitors will look bloated or bulge from the top when they go bad. A bad capacitor will easily prevent any electronics from working properly. It’s common for capacitors to go bad in old power supplies, including the power supply within the television. Even if a faulty capacitor isn’t the primary malfunction for a television, they are a cheap and easy component to replace anyway. If it looks bulged, it will fail at some point.
If you are seeing picture problems, like bowed pictures or single or vertical lines with no picture, you might have a faulty yolk or controlling circuit. The control circuits are easy enough to replace. Check for obvious issues with capacitors. Also, check the vertical and horizontal control ICs. These are typically easy enough to replace. If the yolk is damaged, that can be much more difficult to fix.
Another big issue you will find on vintage TVs is the sound doesn’t work or is very low. That’s because the speakers become worn. The cones may be torn or the gaskets holding the cone are dry, brittle, or missing. Either way, they will produce very poor sound. It’s to be expected. All speakers will wear after decades of use. At the end of the day, a speaker is still a mechanical component that experiences a lot of rapid movement, even on today’s flat screen televisions. If the speaker is worn there is no other alternative, just replace it.
This isn’t a comprehensive field guide to restoring vintage televisions. This guide is only meant to be an introduction. Restoring old electronics is a really fun and challenging hobby, but I’ve always found it best to start any new hobby with the right advice. Hopefully, this guide serves that purposes and has inspired you to restore that classic television.